
Do you have a company and want to start advertising on Facebook and/or Instagram? Then the solution is to set up your Facebook Business Manager account. In this article I provide a step-by-step guide on how to create it and have even included some helpful explainer videos from our YouTube channel.
Creating the Account
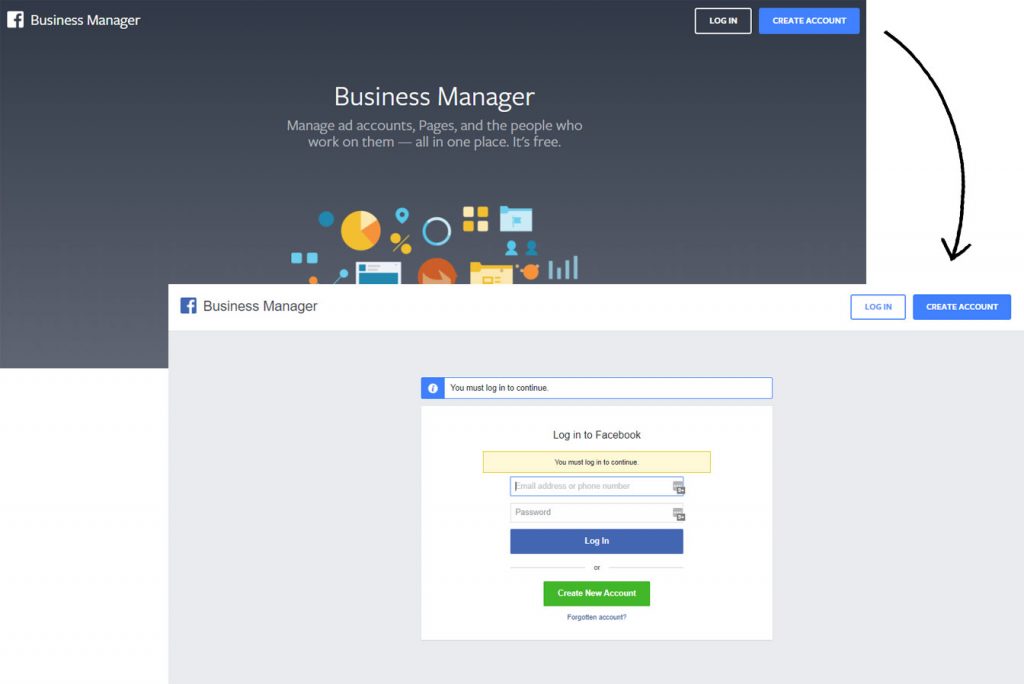
Step 1
Go to business.facebook.com and select 'create account' in the top-right corner. If you are not already logged in to your personal Facebook account, it will prompt you to do so here. For security reasons they need to do this to verify your identity.
Step 2
Specify the name of your business as you would want the public to view it (for example, my company has the name Osito media). Then enter your personal name and business email address. You will be sent a verification email to this address so make sure it is correct. 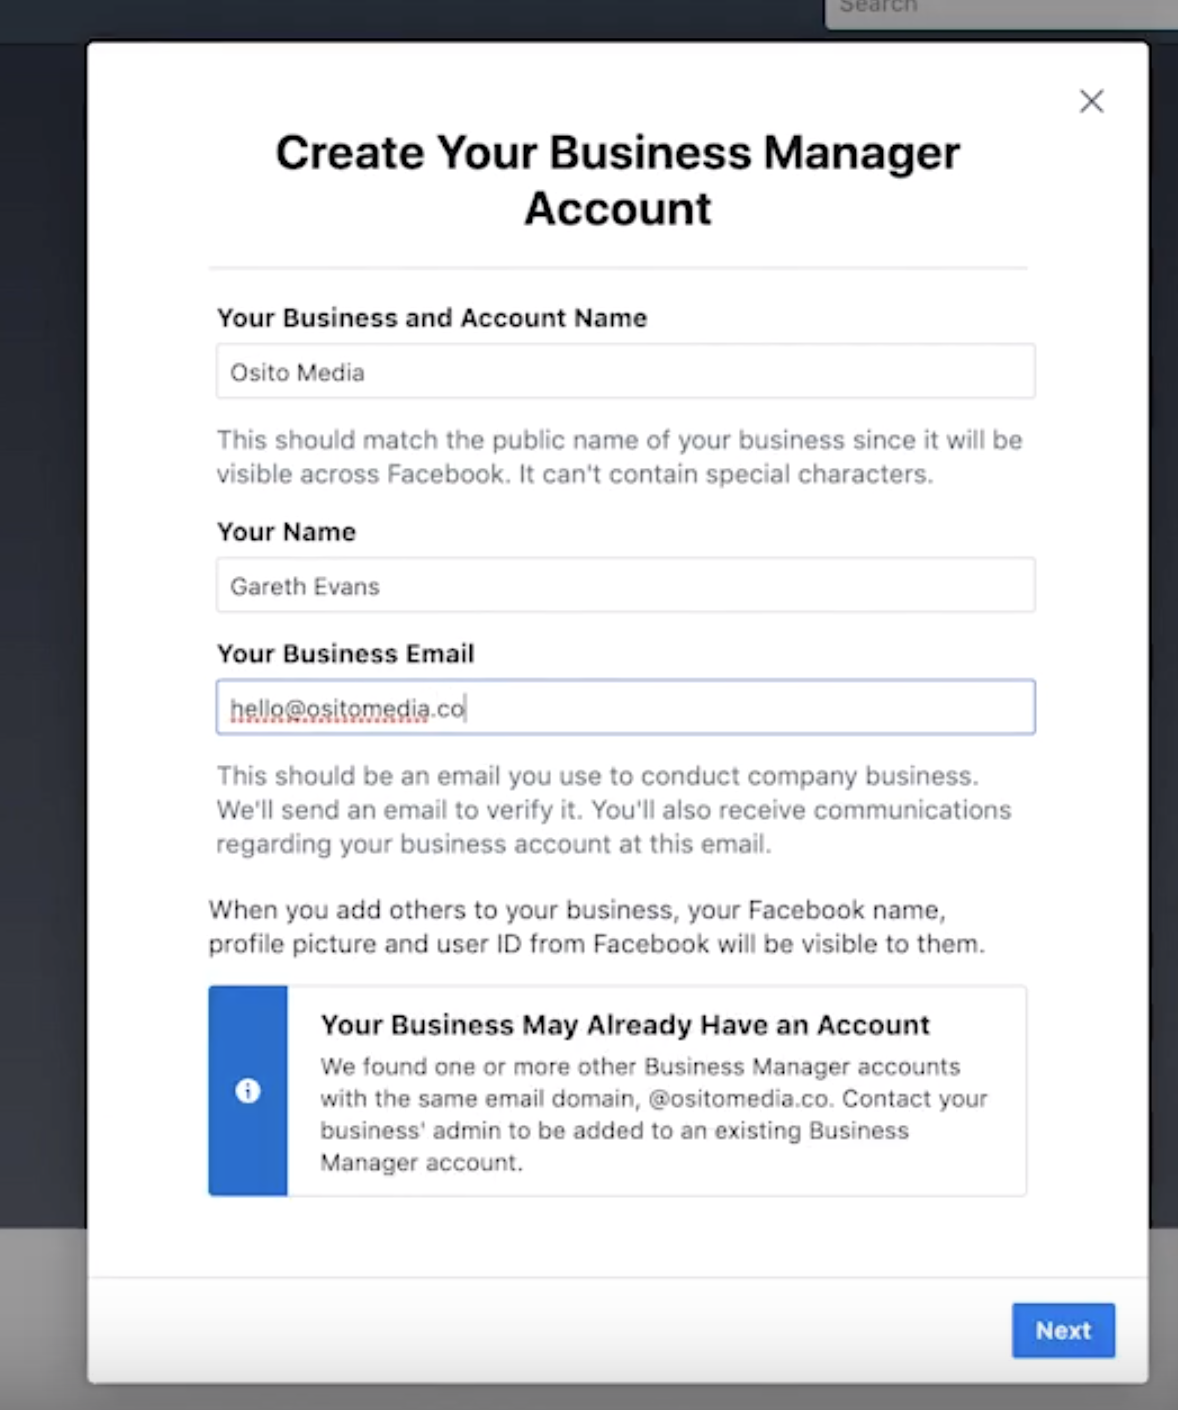
If you've already got an account on the business manager you will see a message at the bottom warning you that your business may already have an account. If that's the case, try logging into the Facebook business manager again to check.
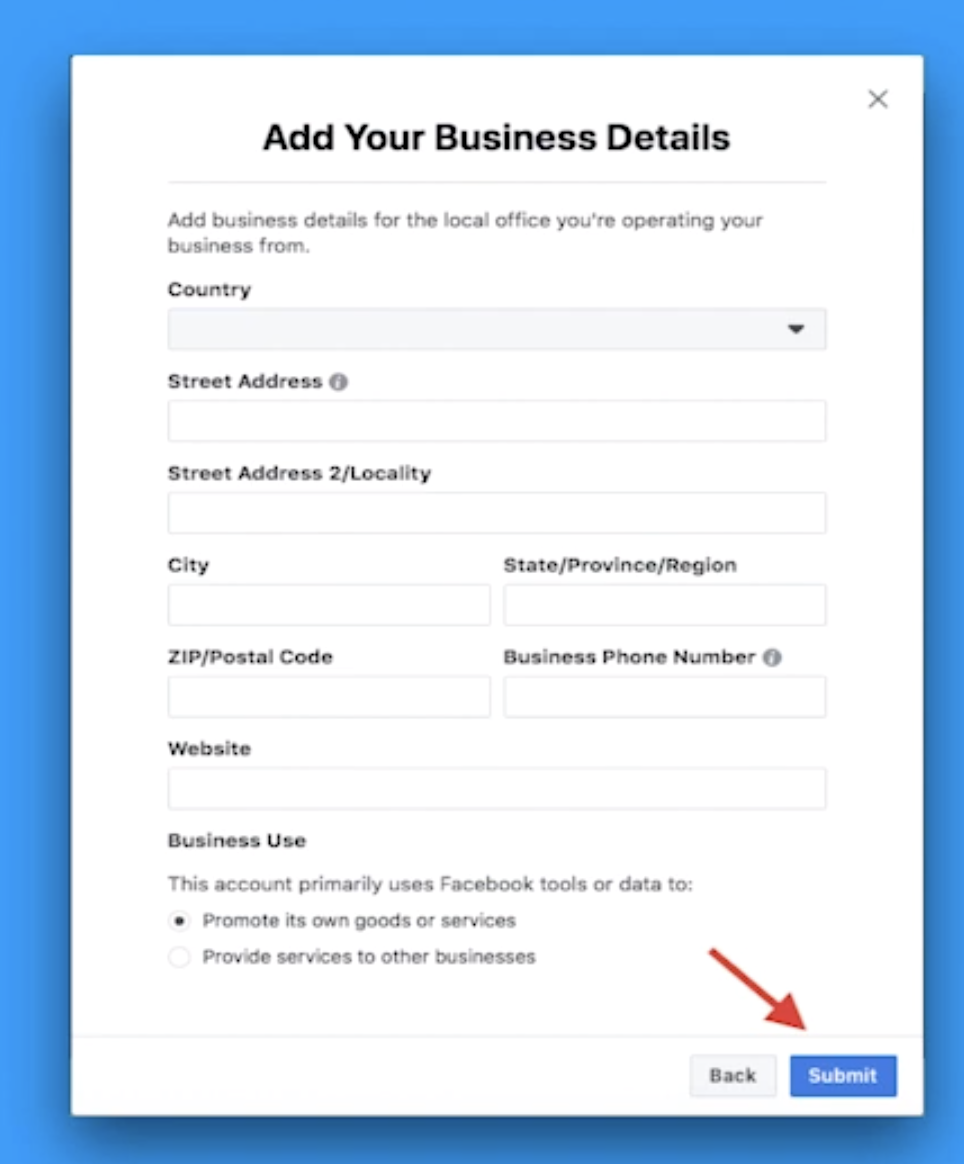
Step 2
Finally, fill in the address of your business premises and the website domain (e.g. ositomedia.co). It's very simple!
The last decision you need to make is for what purpose you are setting up the Facebook business manager. If you are primarily going to be using the business manager for your own purposes (e.g. to advertise your own products and services), then select the first check box. However, if you are using the business manager primarily to advertise other peoples' businesses (which is what we do at Osito Media), then you're going to want to select the second check box.
That's it. You're done! Here's a video to help you out if needed:
Adding Users To The Account
If you have friends, co-workers, or an agency working on your Facebook page and/or running ads, then you're going to need to add users to your business manager account.
Step 1
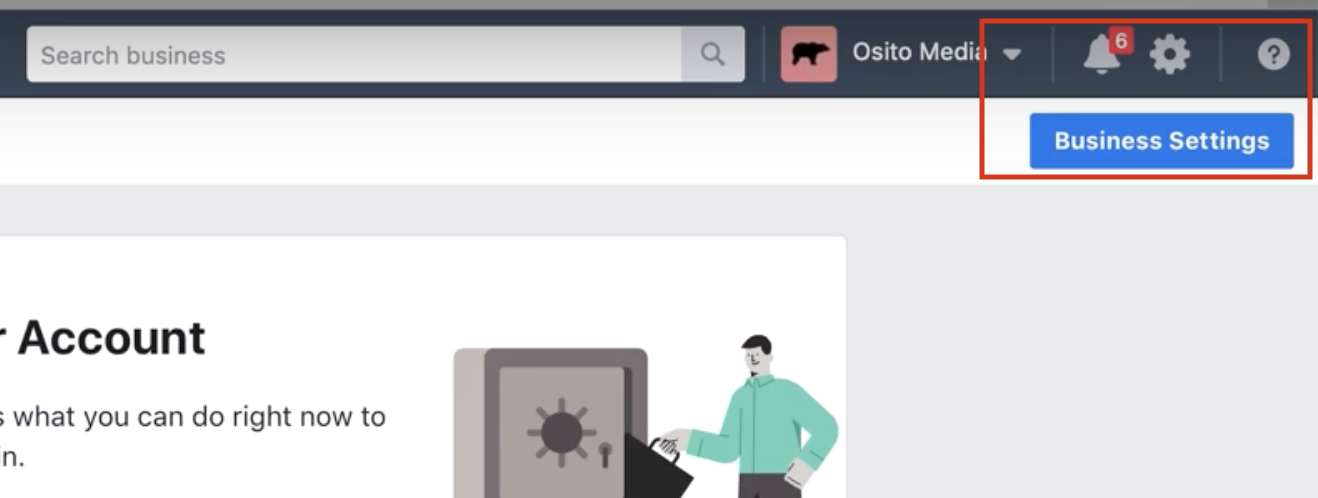
Go to the Business Settings page by clicking the cog in the top right hand corner of your business manager account.
Step 2
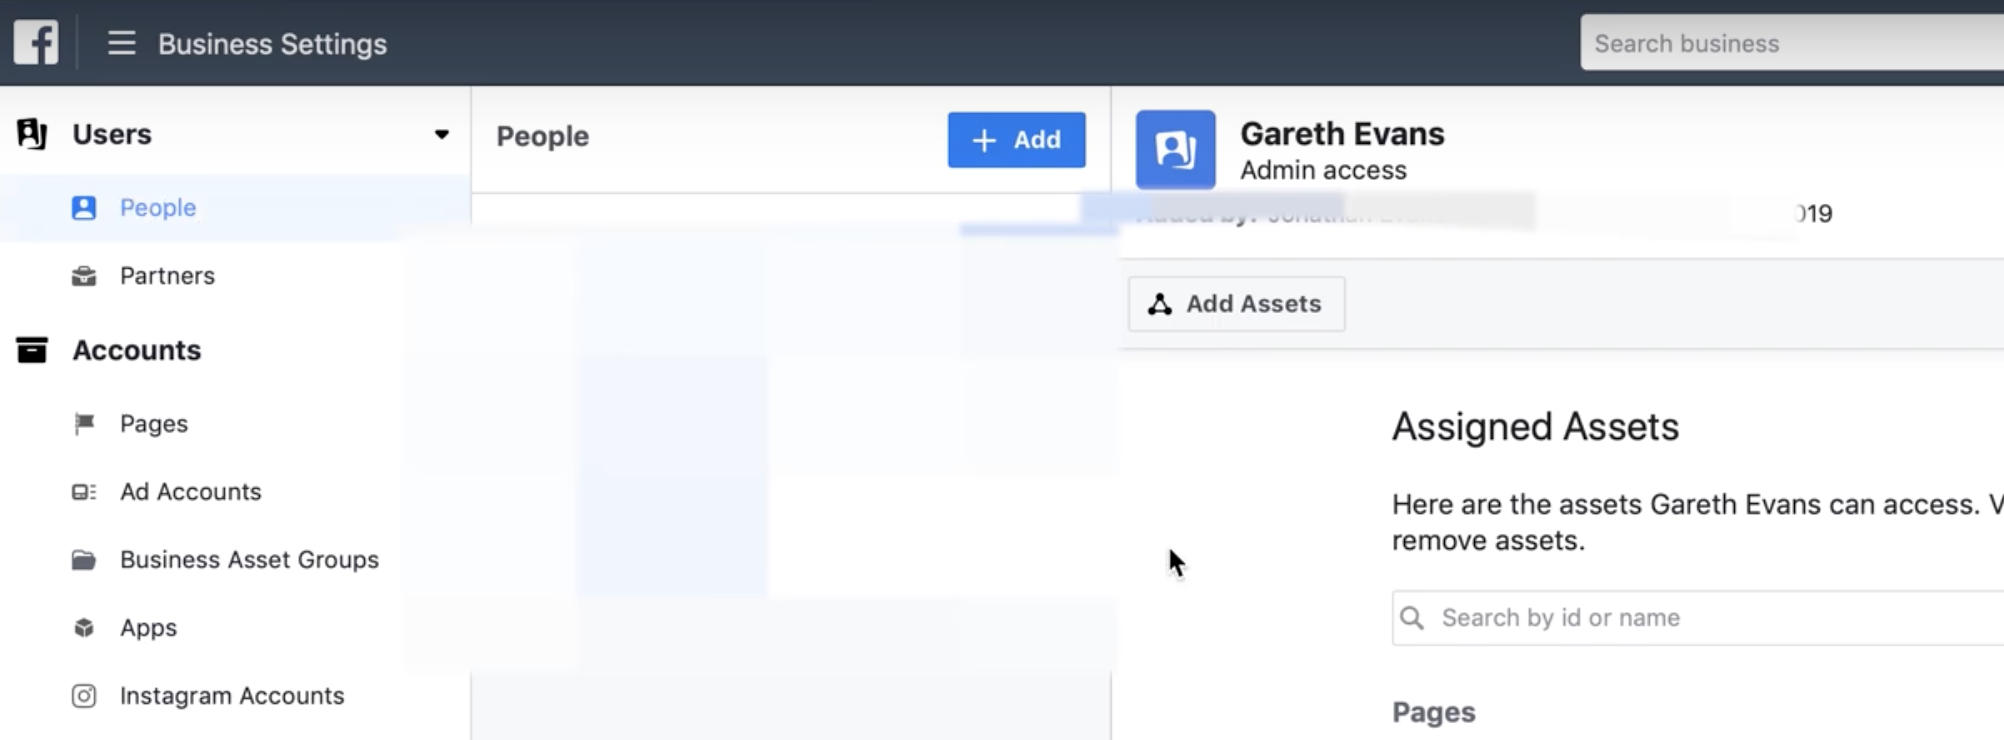
In the left hand column you can see a list of different things. The first heading in this list is 'Users' and under 'Users' you should see a link to 'people' - you want to click on that. When you land on the business settings page this should automatically be selected by default.
In the middle column you will then see a big blue button that says '+ add'. You need to select this to add a new user to your business manager account.
Step 3
A pop-up will display on your screen prompting you to enter some information. The first bit of information you need to fill in is the email address of the user you wish to have access to your account. Without this they will be unable to receive the invite, so make sure you fill it in correctly.
Second, you need to assign a business role. That means, do you want that person do have employee access (which is selected by default), or more extensive admin access that would allow them to edit the account settings, people, etc.
Finally, there are advanced options to assign additional roles. For example, if you want that user to have access to financial information (such as credit card information or spending data), then you can select the appropriate advanced check boxes.
Finally, click 'next'. 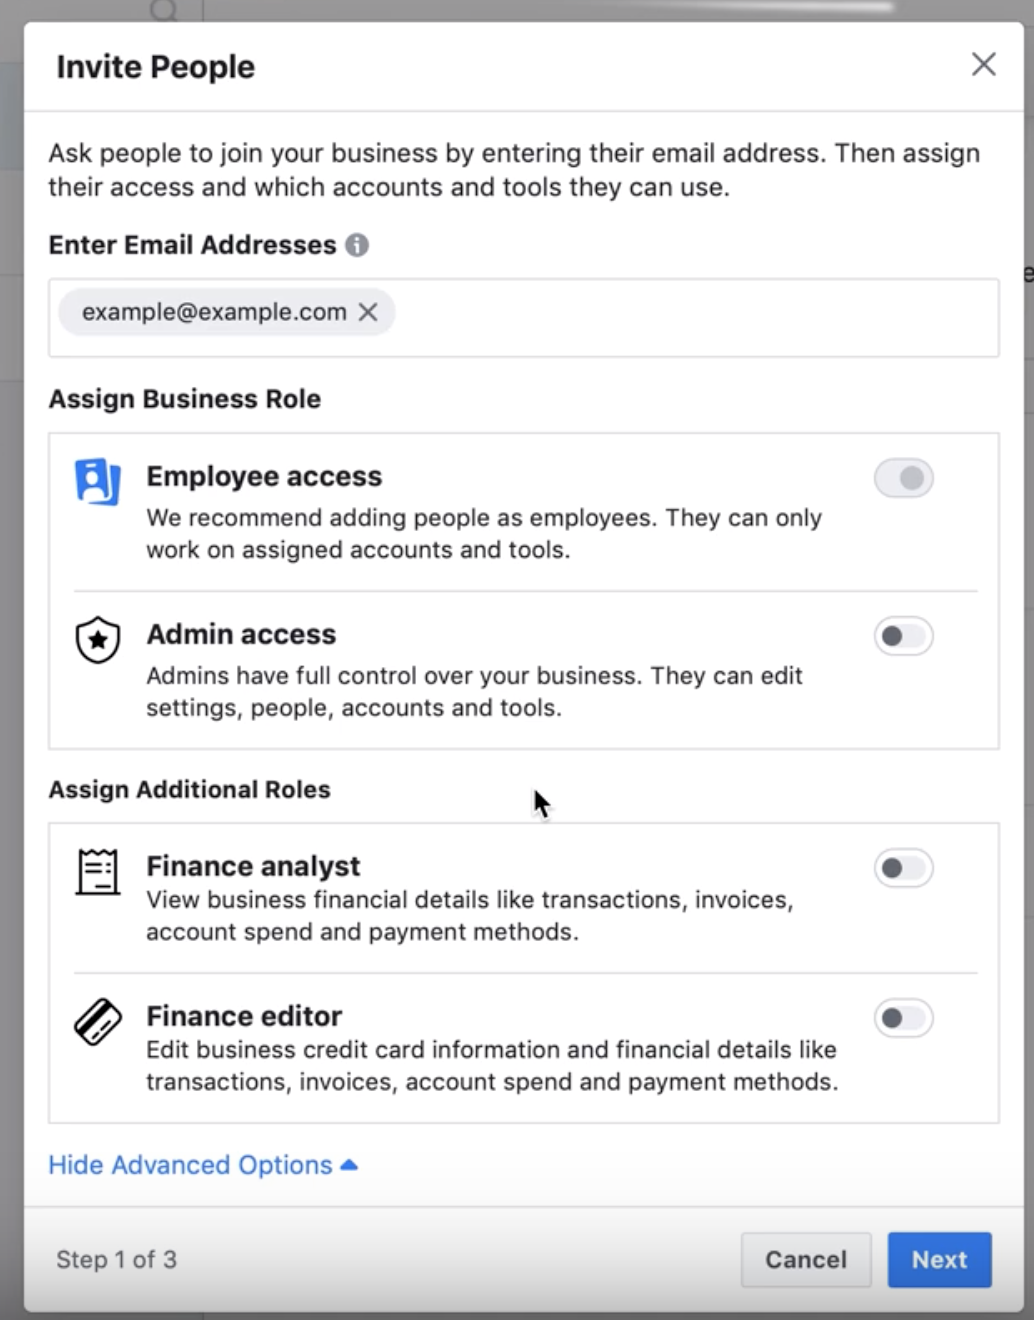
Step 4
You are now taken to another popup. In the far left column you are able to set what asset type you want to give permissions for. The most common assets are the Facebook page and the ad accounts, so if you want to give the person permissions for either or both of these you would select them now.
Once you've selected the relevant asset you want to assign permissions for, you need to choose the exact page or ad account you want to grant them permission over. For instance, if you run multiple Facebook pages you will want to select the specific page or pages you want to give access to.
Finally, you have to set the exact permissions you want to give in the right column. For example, you could give them 'standard access' that would enable them to post to your page, create ads, and more. Or you could give them admin access, which gives them the same level of permissions that you have.

Step 5
Press next and the invitation will be sent to that person's email. Once they click the link in the email they will have instant access to the relevant accounts you granted them access to.
That's it. You're done! Here's another video to help you out if needed:
Conclusion
If you like this content you’re going to love everything else I do. I want to provide you with unbelievable value so you, too, can achieve all your business goals. Let me know what you think of this post and I'd be happy to help any of you guys who may be struggling with setting up your Facebook Business Manager. Also check me out on Instagram, YouTube, and Facebook. 😁
Currently there are no comments, so be the first!